|
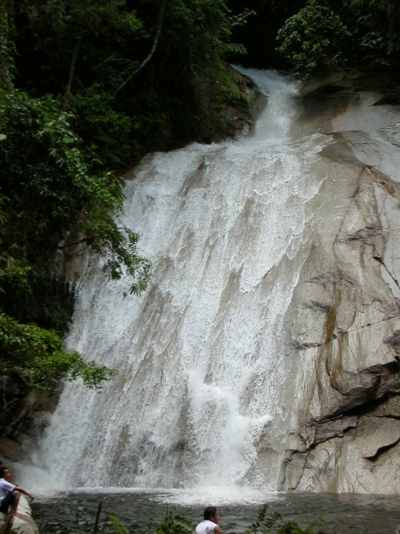
This waterfall known as
Berembun Waterfall [See pix 14] shown in the signboard. If you need to
go to this place. Take the long route, go past Raub town. From there,
proceed north to Kuala Lipis road. Some kilometers out of town, there
will be the official signs to direct you to the correct vicinity. If
you follow this route, from the turn off, the new road will pass
through a fair size Chinese township Sungei Raun. Next, the other town
is Kampong Sungei Klau. Notice the huge signboard? That is the one to
promote this destination. Behind the board, the Hardware shop.
Then a proper set of
signboards [Pix 9] are now planted. First one, next to this Seafood
restaurant [away from sight] & then along the trail. To start the
journey in, follow the road directly opposite the restaurant . The
name of this road? Sungei Chalit. The track to Berembun is not well
marked. This track starts with sharing the same route to Sungei Chalit
which is another recreation area -clear stream and rapids. Do not get
this destination mixed up with the Berembun Waterfalls. So if you are
going for picnic, watch out for this sign on the way.
After 3 kilometers of
"free" ride through Cocoa Plantations, at the point where the next
sign is, there will be junction . This is to tell you to go off road.
Take the right fork. Head for Berembun on this track. But you need one
more turning. How far must you go before you turn into the path
leading to the waterfall? I know that there are a couple of them on
the left. Choose one that looks well used or ask passer-bys. There is
no sign on this critical turn.
If you
have a GPS on hand, then follow this site
http://www.geocaching.com/seek/cache_details.aspx?ID=57362
This signage on the
board hinted that you need a off road vehicle to use the trail to the
waterfall! See for yourself! [pix 13] This is the type, condition and
hardened surface you will be traveling on for the next 10 kilometers.
Use your own discretions. The road, steep at a couple of points hugged
the side of a steep slope. Meaning on one side of the track, the drop
is quite dramatic. See the view of the valley when you are driving
along this track. [pix 12] At the end of the trail is a lavish car
park. [pix 8] Of course, most of the vehicles are 4X4s. This was their
haven before the permanent track was established. Observe the
consistencies in road surfaces. From there, a bridge will help you to
cross the river, to go the Waterfall way.
A word of caution
though! On the last leg, at one point of the track, water had washed
away some top soil, exposing the boulders underneath. Light sedan can
make it through this one point. If you are uncomfortable. Not to
damage the undercarriage of your car, watch for this first bridge.
[pix 7] You could park your car here and walk the rest of the way. The
walking time should be less than 60 minutes. At the parking area,
there is this sign. A trail to the peak. Watch it, this is not a low
mountain.
|